
Hanging a single framed photo is one of those tasks that looks simple right up until the nail goes in crooked, the picture slides sideways, or the anchor pops out of the wall taking a chunk of plaster with it. For a single lightweight piece in a standard drywall home, a nail and a steady hand are enough. But gallery walls, oversized mirrors, and the plaster-and-lath walls common in older Nyack, Piermont, Tappan, and Sparkill homes introduce variables that send a lot of homeowners to our phone number.
Short answer: the right hardware is determined by the weight of the piece and the wall material — not by what's in the package that came with the frame.
The 57-Inch Rule and Furniture Relationships
Before touching a nail, get the height right.
The standard museum-height rule places the center of the artwork at 57 inches from the floor. This puts most art at a comfortable eye level whether the viewer is seated or standing. It also creates visual consistency across a room when multiple pieces are hung — everything relates to the same centerline even when frame sizes differ.
The exception is art hung above furniture: - Above a sofa or console table, keep the bottom of the frame 6–8 inches above the top of the furniture. Lower feels cramped; higher disconnects the art from the furniture visually. - Above a headboard, 4–6 inches of clearance is typical. - Art above a fireplace mantel is often hung too high — the bottom of the frame should sit 4–8 inches above the mantel surface, not at the top of the wall.
Getting these measurements right before driving a single nail saves the wall from a constellation of test holes.
Choosing the Right Hardware: A Weight Guide
This is where most hanging problems start. The hardware that comes in the frame's packaging is often rated for less weight than the piece actually weighs, or it's meant for a wall type you don't have.
Weight-to-Hardware Reference Table
| Piece Weight | Wall Type | Recommended Hardware |
|---|---|---|
| Under 10 lb | Drywall | Standard picture nail or adhesive strip |
| Under 10 lb | Plaster | Adhesive strip OR small finish nail into lath |
| 10–25 lb | Drywall | Rated picture hook (30-lb rated) |
| 10–25 lb | Plaster | Rated picture hook with pre-drilled pilot hole |
| 25–50 lb | Drywall | Toggle bolt or snap toggle anchor |
| 25–50 lb | Plaster | Toggle bolt (standard drywall anchors do NOT grip plaster) |
| 50–100 lb | Drywall or plaster | Stud mount with lag screws, or heavy-duty toggle anchors rated 2x the weight |
| Over 100 lb (large mirrors, heavy art) | Any | Two stud-mounted points with lag screws; structural review if needed |
When in doubt, use hardware rated for at least twice the item's actual weight.
If you don't know how heavy something is, most bathroom scales work well: weigh yourself, then weigh yourself holding the piece, and subtract.
Plaster-and-Lath Walls: A Different Beast
Many homes in Rockland County's older communities — the river towns of Nyack, Piermont, and Grandview, the historic neighborhoods in Tappan and Orangetown — were built before drywall existed. Behind the painted surface is a hard plaster coat over wood lath strips. This wall construction is more durable in many ways than modern drywall, but it behaves completely differently when you try to hang things.
What goes wrong without the right approach: - Standard nails deflect off the hard plaster surface and split the wall face. - Drywall anchors (the plastic expansion type) don't grip well — plaster is too hard and too thin for them to expand properly. - Striking with a hammer without a pilot hole cracks the plaster in a starburst pattern that's expensive to repair.
What actually works: 1. Pre-drill a pilot hole with a masonry or multi-purpose bit before driving any nail or anchor. 2. Use toggle bolts for anything over 10–15 pounds — they pass through the plaster and lath and expand behind it. 3. For heavy items, locate a stud (plaster walls have studs behind the lath, typically 16 or 24 inches on center) and drive a screw directly into the framing. 4. For lighter pieces where you want to avoid drilling, adhesive strips rated for smooth surfaces work on plaster, though we recommend testing a corner first since some older paints don't bond well with the adhesive.
See our notes on drywall repair — we patch plaster cracks too, and if a previous hanging attempt left damage, we can fix it before hanging the new piece.
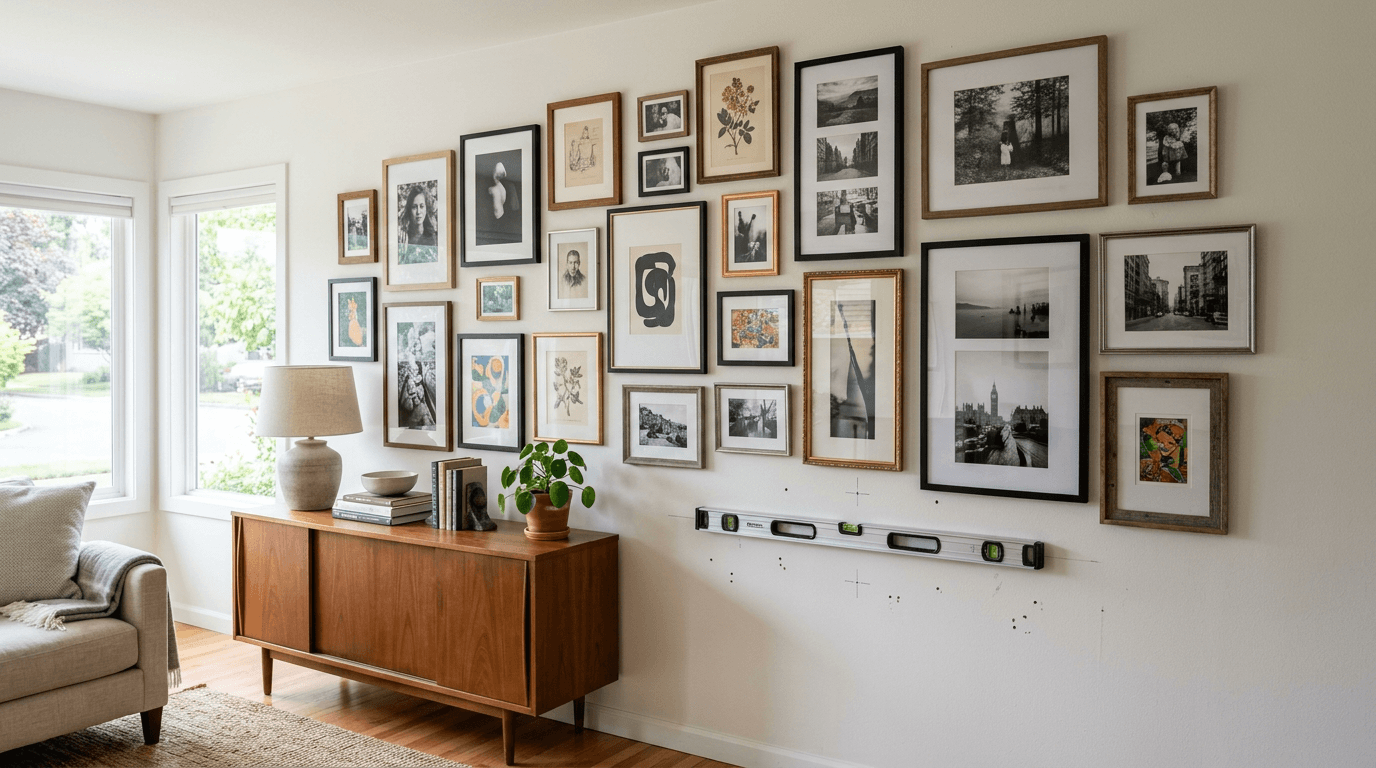
Creating a Gallery Wall
Gallery walls are rewarding when done right and chaotic when done wrong. The difference is almost entirely in the planning step.
The Floor Layout Method Before anything touches the wall, arrange all the frames on the floor in the rough shape of the finished arrangement. Adjust spacing, rotate pieces, and evaluate the overall composition from a standing position. This step alone prevents most gallery wall mistakes.
Spacing and Composition Rules - 1.5 to 2.5 inches between frames creates visual breathing room without making pieces feel disconnected. - Group pieces by a shared element — frame color, matting color, subject matter — to give a mixed arrangement cohesion. - An odd number of pieces (3, 5, 7) usually looks more dynamic than even groupings. - Vary frame sizes but maintain some consistency in orientation (mixing all landscape and portrait frames randomly looks busy).
The Kraft Paper Transfer Method For a precise layout: 1. Lay each frame face-down on kraft paper or newspaper and trace the outline. 2. Mark the hanging hardware location on the paper. 3. Cut out the paper templates and tape them to the wall with painter's tape. 4. Step back, evaluate, adjust the paper templates until you're happy. 5. Nail through the marked hardware points on the paper, then tear away the paper.
This method is slower than eyeballing, but it produces clean results the first time — no pilot holes to patch, no measuring re-dos.
Hanging Order Hang the center piece first, then work outward in all directions. This keeps the arrangement balanced as it grows.
Hanging Heavy Mirrors
A large mirror — anything over 25–30 pounds — deserves more planning than a framed photo. Mirrors are heavy per square inch, and a fall doesn't just damage the wall; it creates a hazard.
Two mounting points are always better than one for mirrors over 25 pounds. Two points distribute weight and, critically, prevent the mirror from tilting outward over time as the wall material slowly compresses around a single anchor.
Hardware recommendations: - D-ring hangers give more control over levelness than wire — when you set a D-ring on a hook, the mirror stays where you put it. - French cleats are the most secure solution for very large or very heavy mirrors — a beveled cleat screws into the wall studs, a matching cleat attaches to the mirror back, and they interlock. The mirror can be lifted off easily but won't fall. - For mirrors where studs aren't perfectly positioned, heavy-duty toggle anchors rated for at least twice the mirror weight are appropriate for drywall. For plaster, go into studs whenever possible.
The goal is always at least one mounting point into a stud. We come prepared with a stud finder, a laser level, and a selection of hardware, so we're not making a second trip to the hardware store mid-job.
What to Hang Above a Sofa: Proportions Matter
A common misstep is choosing art that's too small for the wall above a sofa. The general rule: art or a grouping above a sofa should span roughly two-thirds of the sofa's width. For a 7-foot sofa, that's about 56 inches of visual width — either a single large piece or a grouping that fills that span.
A single small frame above an 84-inch sofa looks like a postage stamp. Either go larger, or build a grouping wide enough to hold the visual weight of the furniture below it.
For more on how we approach these installations, see our picture hanging service page.
Frequently Asked Questions
How high should pictures be hung on a wall? The standard is to center artwork at 57 inches from the floor — this is the height museums use and it works well for most rooms. When hanging above furniture, measure 6–8 inches up from the top of the furniture piece instead of using the 57-inch rule.
What's the best way to hang something heavy on a plaster wall? Use toggle bolts, not standard plastic drywall anchors — those don't grip plaster reliably. Pre-drill a pilot hole first to avoid cracking the surface. For anything over 40–50 pounds, try to locate a stud behind the plaster and drive a lag screw into the framing.
Can adhesive strips hold a mirror? Adhesive strips are rated for certain weights on certain surfaces, but we'd caution against relying on them for mirrors heavier than about 8–10 pounds. The adhesive can fail gradually, especially in rooms that see humidity changes. For anything heavier, use mechanical hardware.
How far apart should pieces be in a gallery wall? A spacing of 1.5 to 2.5 inches between frames is the most common range. Tighter than 1 inch starts to feel cluttered; wider than 3–4 inches makes the pieces feel unrelated rather than grouped.
Do I need a stud for every picture? No. For pieces under about 20–25 pounds, a properly rated anchor in drywall holds fine. For heavier pieces — large mirrors, oversized framed canvas work, anything over 30–40 pounds — at least one mounting point into a stud is strongly recommended.
How do I stop a picture frame from tilting? Stick a small adhesive bumper (felt or rubber) on the bottom two corners of the back of the frame. This grips the wall and keeps the frame level. For wire-hung pieces, make sure both sides of the wire sit at the same height on their hooks.
Ready to Hang It Right?
We come prepared with a laser level, stud finder, and a full range of hardware — from standard picture hooks to heavy-duty toggle anchors and French cleats. Whether it's a gallery wall in your New City living room, a large mirror in a Nyack bathroom, or a series of prints in your Tappan hallway, we'll get everything level, secure, and looking the way you imagined. Call or text (908) 461-2688 or request a free estimate.
Odds & Ends Handyman Service is a licensed Rockland County Home Improvement Contractor (#H-25-600), insured for $1,000,000, serving Rockland County, NY since 2001.
Related