
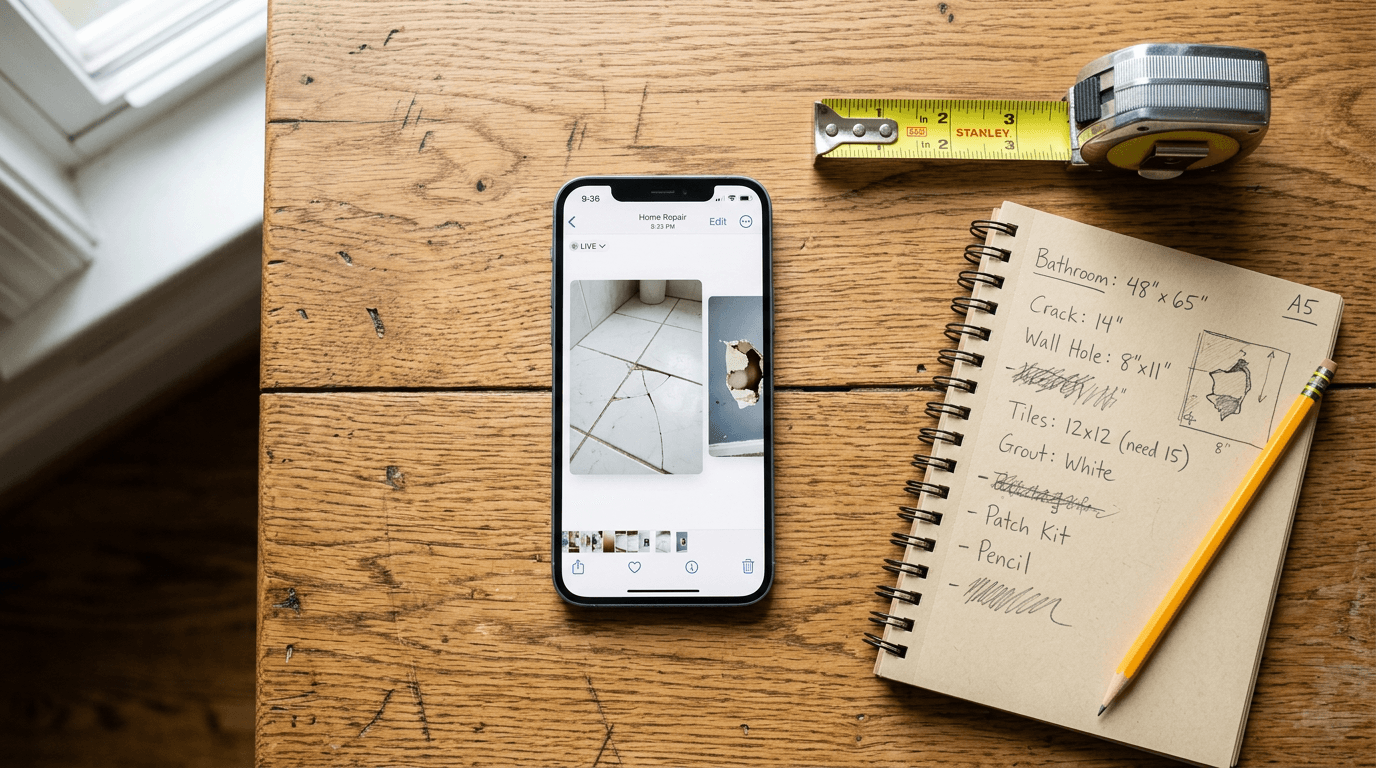
The fastest way to get an accurate handyman quote is not a phone call describing the problem — it is a handful of clear photos. After 25 years of estimating work across Rockland County, we can tell you that good photos are the single biggest factor in a quote that holds up when we arrive.
Short answer: to get an accurate handyman estimate, send one wide shot showing the problem in context, two or three close-ups of the actual damage, a photo with something for scale (a tape measure, a credit card), and a shot of the access point — all in good natural light. Add a one-line description with each photo. That package lets a handyman quote your job tightly without a site visit.
Why Photos Get You a Better Quote
A handyman pricing a job is really pricing three things: the work itself, the complications around it, and the access. A verbal description covers maybe the first one. Photos cover all three. When we can see your job clearly, you get:
- A tighter price — fewer "it depends" hedges, fewer padded estimates
- Fewer surprises — we spot the old plaster, the missing shutoff valve, or the rot before quoting, not after
- Faster scheduling — many jobs can be quoted and booked without a separate visit
This is exactly how our free estimate process is built to work. Now here is what makes photos genuinely useful.
Start Wide: Show the Problem in Context
Begin with a wide shot of the whole area. Step back far enough that we can see where the problem sits. A drywall crack near a window corner, near the ceiling line, or in a tight hallway tells us very different things about the cause and the fix. Context is what stops us from quoting the wrong job.
Then Get Close: Capture the Actual Damage
Move in for two or three close-ups of the specific issue:
- For a drywall crack or hole: show the width, and whether the edges are clean or crumbling.
- For a faucet or plumbing fix: photograph the fixture and the connections underneath in the cabinet.
- For a deck board: show the soft or split board and the boards on either side.
- For a light fixture: show the fixture and, if you can, the ceiling box behind it.
Include Something for Scale
A crack that looks minor in a photo could be six inches or six feet — a camera flattens size. Lay a tape measure, a pen, or a credit card next to the damage. For larger areas, having a person stand in frame works. Scale turns a guess into a measurement.
Light It Properly
Use natural daylight whenever possible. A direct camera flash blows out detail and hides exactly the texture and depth we need to see. For dark spots — under a sink, inside a closet, a basement corner — hold a flashlight or phone light at an angle to the surface rather than straight on. Raking light reveals cracks, dents, and rot that flat light hides.
Shoot Multiple Angles
Three photos from different angles beat one straight-on shot. For a sticking door, show it closed, show where it contacts the frame, and show the hinge side — those three frames usually tell us whether it is a plane-and-rehang or a settling issue. For TV mounting, show the wall plus nearby outlets, windows, and furniture so we can plan placement and cable routing.
Don't Forget the Access Point
For plumbing, electrical, or structural work, photograph how we get to it: the cabinet under the sink, the crawl space hatch, the attic access, the basement stairs. Access drives time, and time drives price — a third-floor walk-up and a ground-floor ranch are different jobs even when the repair is identical.
Photo Checklist by Job Type
| Job type | Photos that help most |
|---|---|
| Drywall or plaster repair | Wide context shot, close-up with scale, surrounding wall |
| TV mounting | The wall, the TV box label, nearby outlets and furniture |
| Faucet or plumbing fix | The fixture, the connections below, the shutoff valves |
| Deck or fence repair | The damaged area, adjacent boards or posts, the full structure |
| Light fixture or ceiling fan | The fixture, the ceiling box if visible, the wall switch |
| Door repair or replacement | Door closed, the gap or contact point, the hinge side |
How to Send Your Photos
Text or email your photos when you request an estimate, or text them to (908) 461-2688. Add a short note with each one — for example, "crack above the bedroom window, first appeared last winter and it has gotten longer." That single sentence about history and change often tells us as much as the photo itself.
Frequently Asked Questions
Can a handyman give me an estimate from photos?
Yes. For most common jobs — drywall repair, TV mounting, faucet swaps, deck board replacement, light fixtures — a handyman can give an accurate written estimate from clear photos plus a short description, with no site visit needed. Larger or more complex projects may still need an in-person look.
What photos should I send for a handyman quote?
Send a wide shot showing the problem in context, two or three close-ups of the actual damage, one photo with something for scale, and a shot of the access point. Use natural light, shoot from multiple angles, and add a one-line description to each.
Do good photos make a handyman estimate cheaper?
Indirectly, yes. Clear photos let a handyman quote precisely instead of padding the estimate to cover unknowns. They also reduce the chance of a price change once work begins, because complications are spotted up front.
How do I photograph damage in a dark area?
Hold a flashlight or phone light at an angle to the surface rather than pointing it straight on. Raking light brings out cracks, dents, soft spots, and rot that a flat direct flash washes out.
Send Your Photos, Get a Real Quote
Snap a few photos following the steps above and request a free estimate, or call or text (908) 461-2688. The better your photos, the tighter our quote — and the fewer surprises on the day of the work. Odds & Ends has been quoting honest, accurate jobs across Rockland County since 2001.
Odds & Ends Handyman Service is a licensed Rockland County Home Improvement Contractor (#H-25-600), insured for $1,000,000, serving Rockland County, NY since 2001.